Implementation
Static signatures are defined as scanned images of handwritten signatures that were originally signed on paper. Signatures captured in this way represent the visual image of the signature but do not contain any direct data about:
- The sequence or direction of the strokes.
- The speed of the pen or the applied load.
NB: Static data is less informative than the data of dynamic signatures captured using an electronic pen, and as a consequence static verification is not as secure.
Static verification is handled by the SSV (Static Signature Verification) and GSV (General Signature Verification) SDKs. Successful implementation of static verification using either SDK depends on the design of the forms on which the signatures were written, as well as the quality of the scanned data. This page provides guidelines on how to obtain the best results.
Basic Principles
The static verification engine needs to identify the shape of the ink representing each signature. An image that has a light, uniform background with sharply contrasting dark ink will have a readily identifiable signature. If the scan includes additional visible markings, then it is more difficult to differentiate the signature ink, with the results thus being poorer. Examples of problems that can compromise the effectiveness of static verification include:
- Images which contain printed or handwritten text in addition to the signature
- Background patterns or pictures
- Printed signature boxes or signing lines
- Poor contrast between the signature ink and the background
Some image cleaning can be provided by the verification component, but wherever possible, the calling system should supply cropped images that contain only the signatures with no additional background markings. The system designer needs to take into account the form layout to ensure the location of the signature is clearly indicated in a consistent location so that it can be automatically cropped, removing all irrelevant visual markings. The verification engine is not currently designed to process the scans of complete pages.
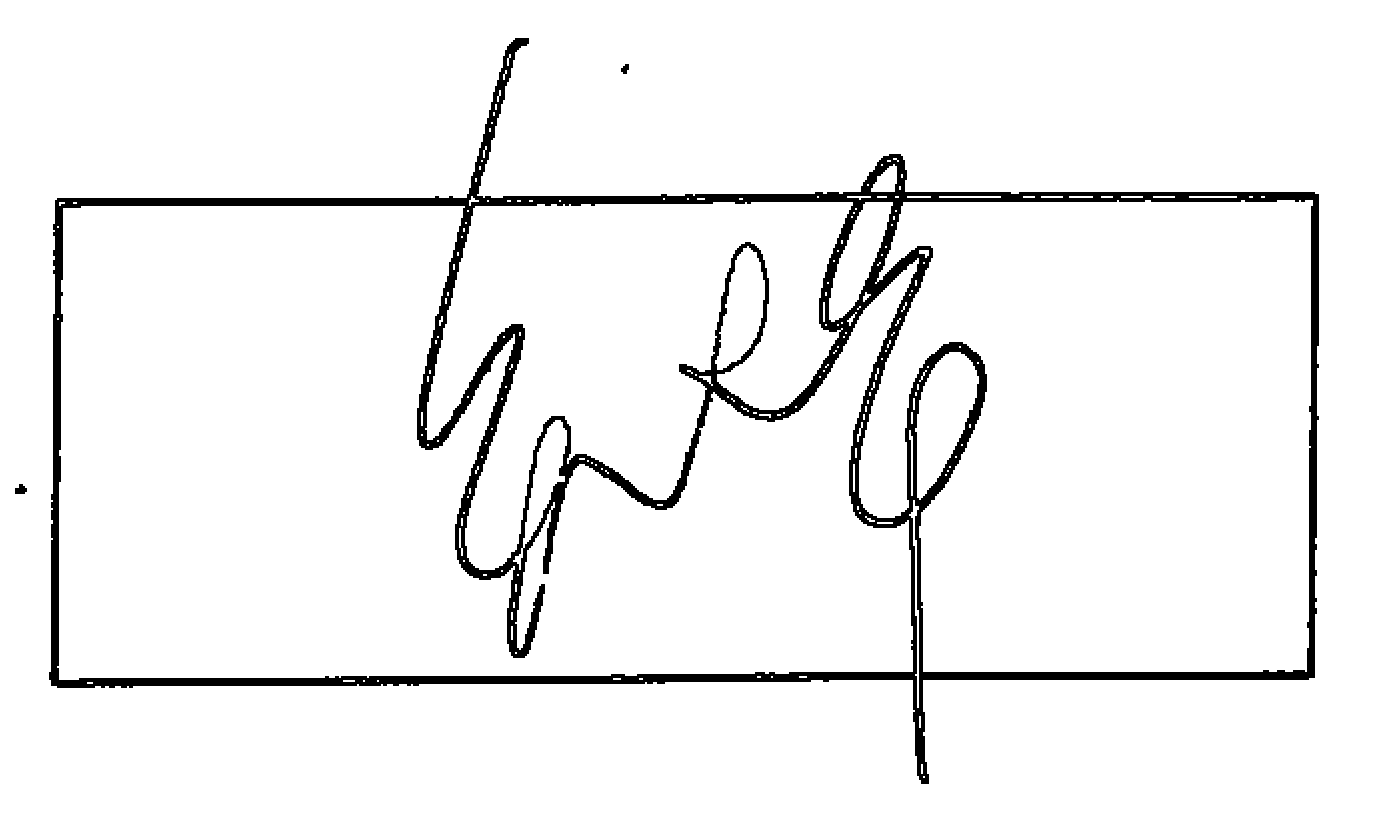
The example below has several problems, including the presence of additional markings that aren't part of the signature; a vertical line through the signature, possibly resulting from a paper fold; and poor capture of the signature ink leading to speckled strokes. Images of this quality indicate a poorly set up system and need to be cleaned before the signature can be verified successfully.
Scanning
Ideally, signatures should be scanned at a resolution of 600dpi. Lower resolutions can be handled but should not be less than 200dpi.
Monochrome images can be used successfully, so long as the background is plain. Heavily textured paper can result in a speckled background. This can be corrected by the verification component, but this extends the processing time. Grey-scale or color images can reduce the problem.
Scanner settings must be adjusted to eliminate the background texture wherever possible but not to the extent that the ink image becomes fragmented. The signature ink must be continuous and not broken up by the scanning process.
Form Design
The design of the form used to collect signatures can make a big difference to the quality of the signature data. The main principles to consider are:
- The area in which the signature is to be applied must be clearly indicated. This is necessary to facilitate the accurate scanning and cropping of the data.
- Using a single horizontal line to indicate where a signature must be written should be avoided. If one has to be used it should be relatively pale and color scanning should be used.
- When a rectangular box is used to indicate the limits of the signing area it should be big enough to allow people to sign normally without constraint. Small signature areas will inevitably be exceeded, resulting in the signatures crossing the box edges and possibly crossing other parts of the content.
- When documents are to be folded the signature area should not cross the fold line, as this can result in an apparent dark line.
Image Cropping
Signed documents must be scanned and the signature image cropped by the system handling the images. The verification component cannot handle scans of full pages.
If the cropped image includes the box defining the signature area, this can be removed by image cleaning, but it is better to avoid this if possible.
Image Cleaning
The verification components provide several options for cleaning images that contain additional visual information. In general, these control issues which affect all samples being handled by a system; it's not intended that different options should be used for individual samples.
| Option | Purpose |
|---|---|
| removeSpeckle | Remove small dots produced by poor scanning or low-quality paper |
| removeFold | Remove straight lines resulting from folds in the scanned paper |
| removeBox | Remove the rectangular box defining the signature area without removing any of the ink, including in places where it crosses the box. An example of this can be seen below in Figure 1. |
| removeSigningLine | Remove a printed signature line. |
| adjustContrast | Adjust the image contrast before extracting signature ink. This can be used when there is inadequate contrast between the signature ink and the background image, and can improve the quality of the signature data. |
| setImageResolution | The image resolution should normally be defined in the image metadata. However, some scanners fail to set the correct value and as a result the sizing information is incorrect. This option forces the correct value to be used, overriding the image data. |
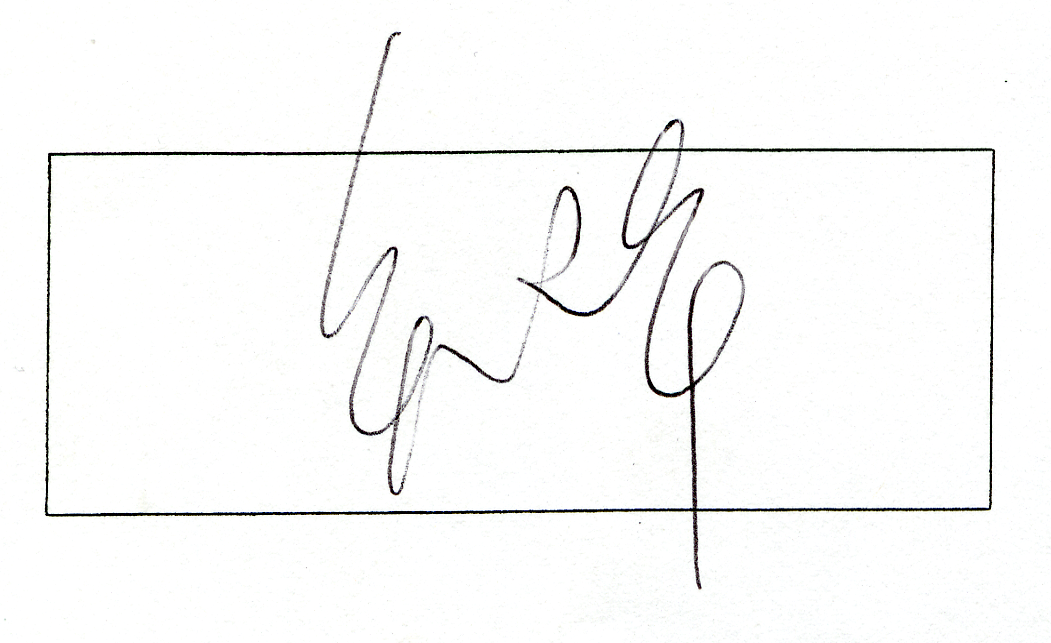
Figure 1: Example of where removeBox would be appropriate: 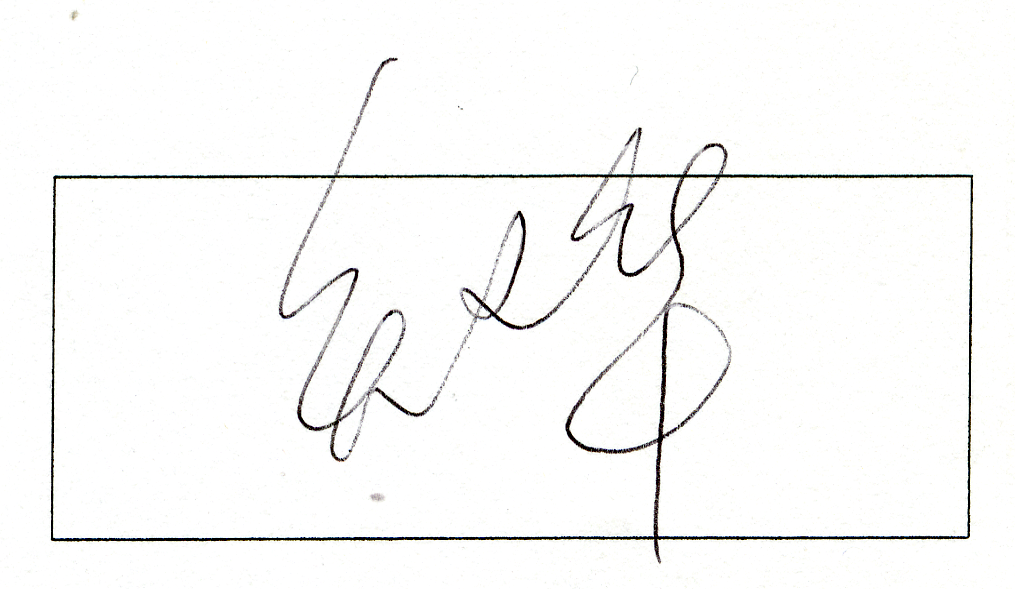
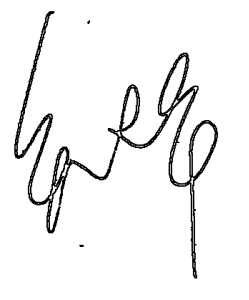
An example of Image Cleaning can be seen below:
Stage 1:
The original scanned image.
Stage 2:
Shape extracted when no cleaning options are used.
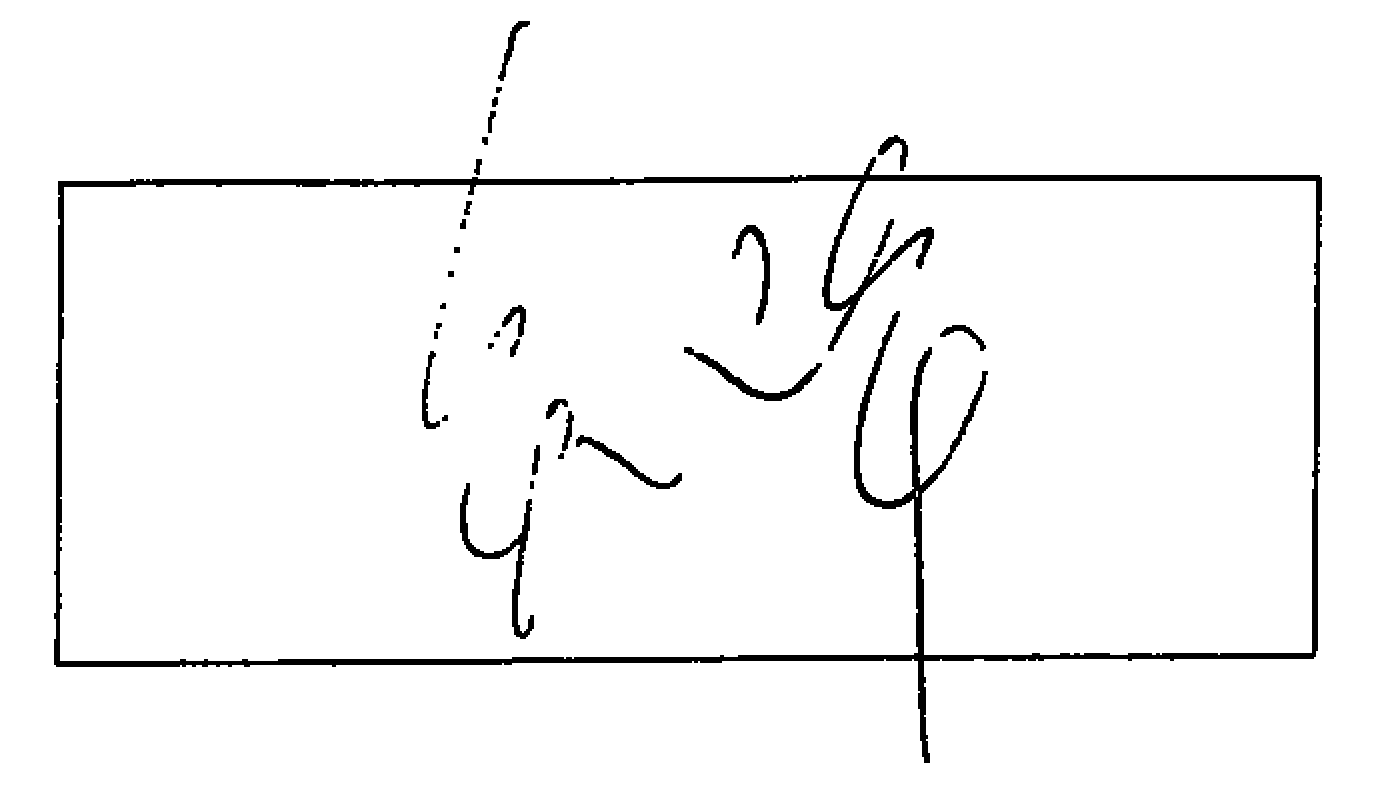
Much of the signature ink is missing, and the box is incorrectly included.
Stage 3: Shape extracted when adjustContrast is set to -20.
The signature is now complete, but spurious points have been introduced and the box is still included.
Step 4: Result after setting adjustContrast to -20 and removeSpeckle is used.
Most of the smaller dots have been removed.
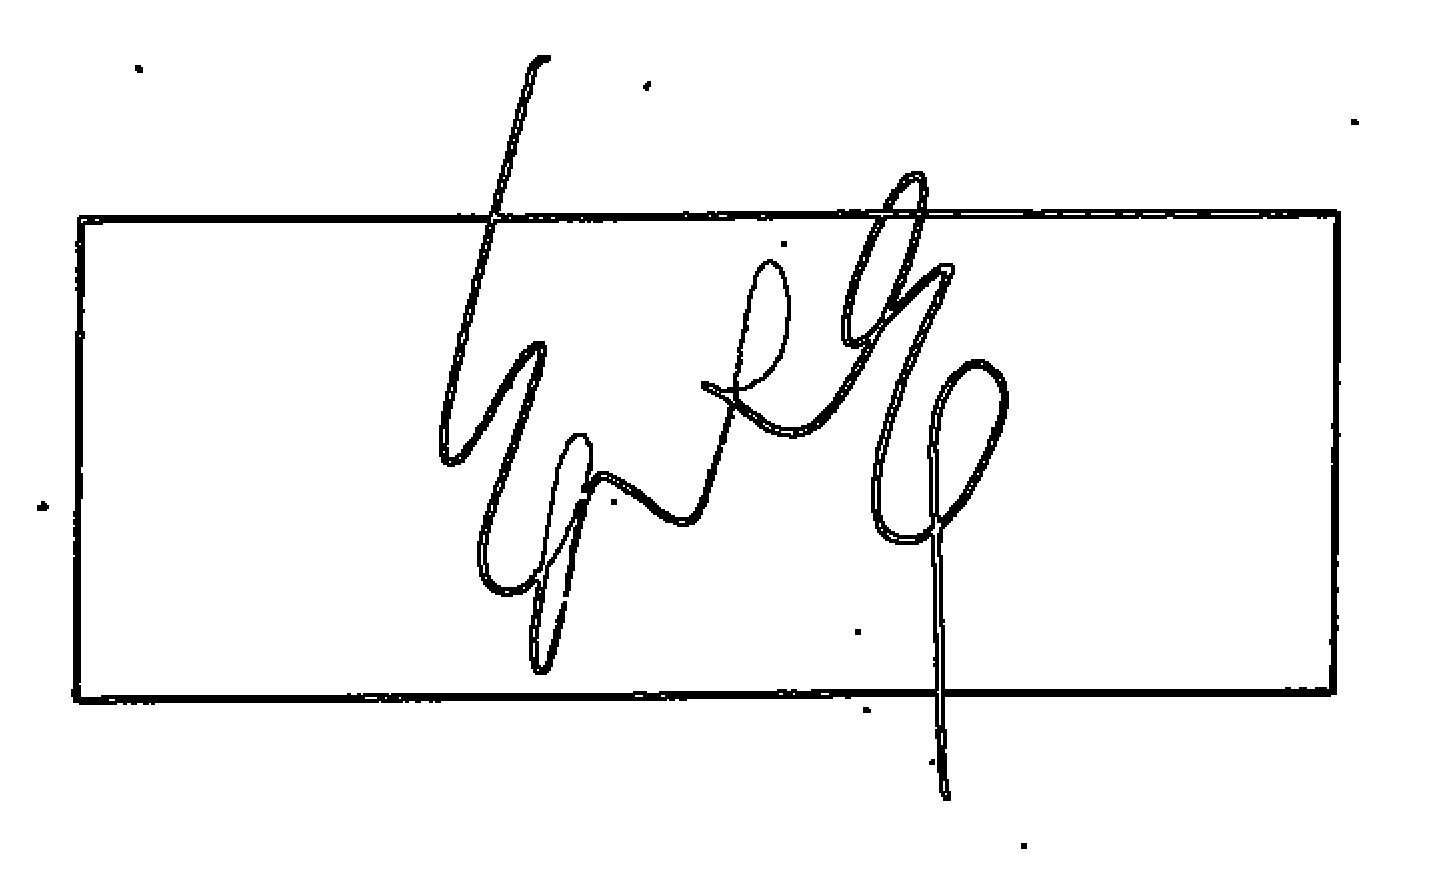
Step 5: Signature shape extracted after setting adjustcontrast to -20 and the removeSpeckle and removeBox options are used.
The extracted shape now consists of just the signature shape, as intended.
A properly set up system using a good form design will normally make cleaning options unnecessary. When they are used the same settings will normally apply to all images from a given system.
System Testing
It is strongly advised that the quality of the images being verified should be checked during design and implementation to ensure that the verification engine is receiving the correct data. Sample images can be supplied in a support ticket opened with Wacom Technical Support for assessment.