Using sign pro PDF
Insert Signature
![]() - to sign the document
- to sign the document
The Sign Document dialog is displayed. This shows the name of the person who is about to sign and the reason for signing. Both are initialized in Signature... Identity.
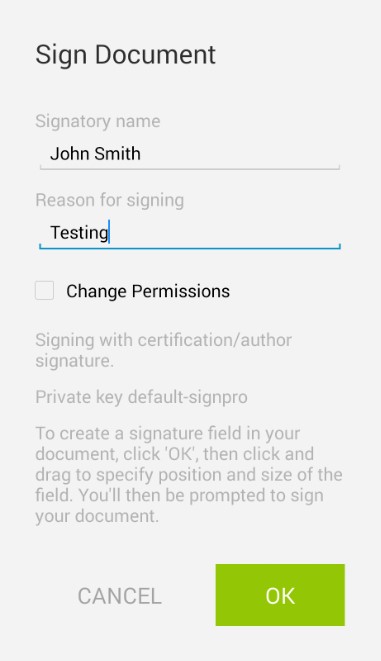
If the fields Signatory name and Reason for signing are left empty and no name and reason have been specified in Identity, the name will be set to Customer, and the reason will be set to Confirmed at the time of signing.
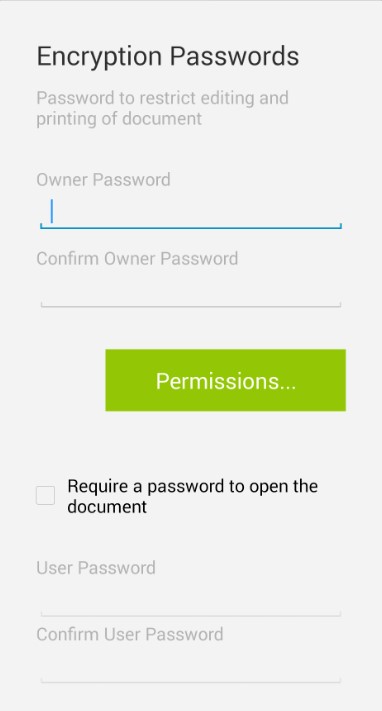
To encrypt the document with a password when adding the first signature to a document, Select Change Permissions.
To change the default permissions:
- select Permissions in Permissions.
-
Press OK to continue.
-
Draw a rectangular placement for the signature:
- Tap in the document to create a signature area with default size
- Tap and drag to size the signature area manually
NB: If Position signature by keyword has been selected, the position and size of the signature area will be determined by the values specified in Signature Area.
The signature capture window is displayed showing the name of the person and the reason for signing. Users can now sign:

Tap one of the following icons to complete the signature:
 to clear the signature and sign again
 to abandon the signature
 to accept the signature and insert it in the document
On completion, the signature is inserted in the document with its optional textual information:

Once the signature has been added to the document, its properties can be displayed by tapping on it.
Insert predefined Signature Area
![]() - to insert a predefined signature area
- to insert a predefined signature area
NB: a signature area cannot be inserted in a document that has already been signed; in this case, the tool is not displayed.
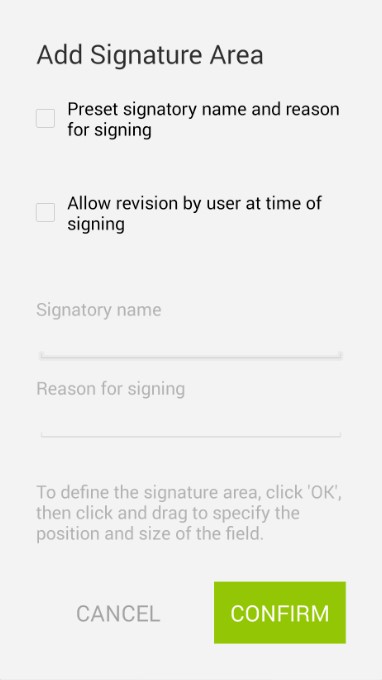
Decide whether the signatory name and the reason for signing will be predefined, or whether these values can be revised at the time of signing. If a signatory name and a reason for signing should be specified:
- Enter the name in the field Signatory name.
- Enter the reason in the field Reason for signing.
To define the signature area, tap OK, then tap and drag to specify the position and size of the field. The new signature area will be displayed with text depending on the settings made in the first step.

Save the document for later use. To sign the document, open it and tap on a predefined signature area.
Insert eSeal
![]() - to insert an eSeal to sign the document
- to insert an eSeal to sign the document
Documents can also be signed with an electronic seal (eSeal). To do this, select eSeal style in eSeals.
Insert the eSeal in the document by selecting the eSeal tool. The Sign Document dialog is displayed. This shows the name of the person who is about to sign and the reason for signing.
The options are identical to those available when inserting a handwritten signature as in Insert Signature:
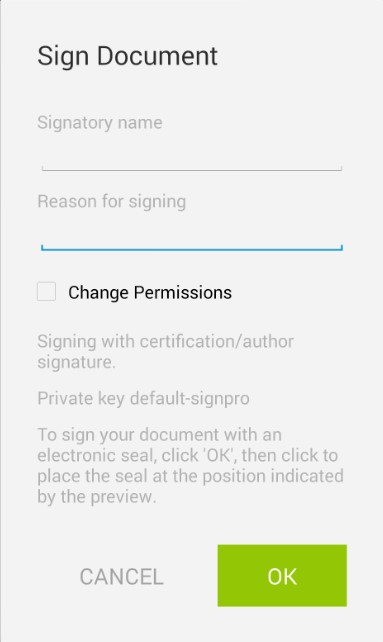
Tap at the required position to insert the eSeal.
Once the eSeal has been added to the document, its properties are displayed by tapping on it.
The eSeal type to be used to sign documents can be customized in eSeals.
Three eSeal types are available for selection:
- Personal eSeal of circular or rectangular shape with customizable text


- Date eSeal with a circular shape with the current date and customizable text

- A custom bitmap image
Insert freehand pen annotation
![]() - to insert a freehand annotation
- to insert a freehand annotation
Use the tool to add a freehand annotation to the document using the pen.
The ink annotation toolbar is displayed:
![]()
Use ![]() to change the pen color, opacity or
size
to change the pen color, opacity or
size
The option displays the available palette:

Tap the selection required to make the change.
 - to resume drawing
 - to erase a part of the drawing
 - to accept the annotation in the document
 - to abandon the annotation
If the user name for sign pro PDF has not been set, a prompt to enter the user's name before creating the annotation will appear. This can also be set in Signature... Identity.
Insert Text Effect
a) Strikeout selected text
 - to strikeout to the selected text
b) Underline selected text
 - to underline selected text
c) Highlight selected text
 - to highlight selected text
Tap with either pen or finger input on the first character, then drag over the text to be affected. A popup window is displayed to assist in locating the text.
After applying the text effect, the appearance may be adjusted by tapping the affected text. A popup gives options to clear the change or to change the appearance.
Tap the selection required to make the change.
Insert sticky note
![]() - to insert a sticky note
- to insert a sticky note
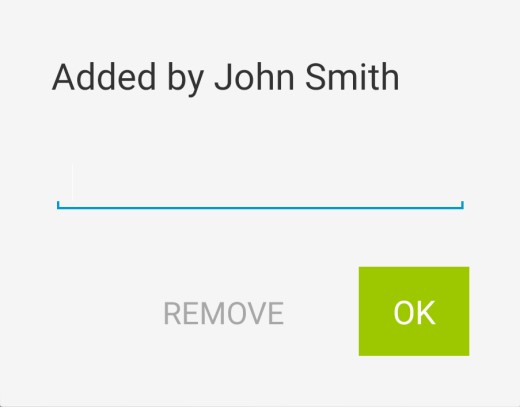
Wacom sign pro PDF displays sticky note comments contained in the document. An existing sticky note can be displayed by tapping on it.
Sticky notes are indicated by the balloon icon:

To add a new sticky note, tap the tool then tap at the position in the document. The sticky note comment dialog is then displayed with the user name:
Text may now be entered using the keyboard.
Existing sticky notes can also be removed by tapping them and then selecting Remove.